The OwnerListens Settings Page
In this blog post we’ll dive deep into the OwnerListens Settings page, going over its various sections and options. As always, if you have any specific questions, please text us at 650-825-1166 or email [email protected].
Getting there:

Head to your dashboard, click your name on the top right and click Account Settings.
Your Settings Page
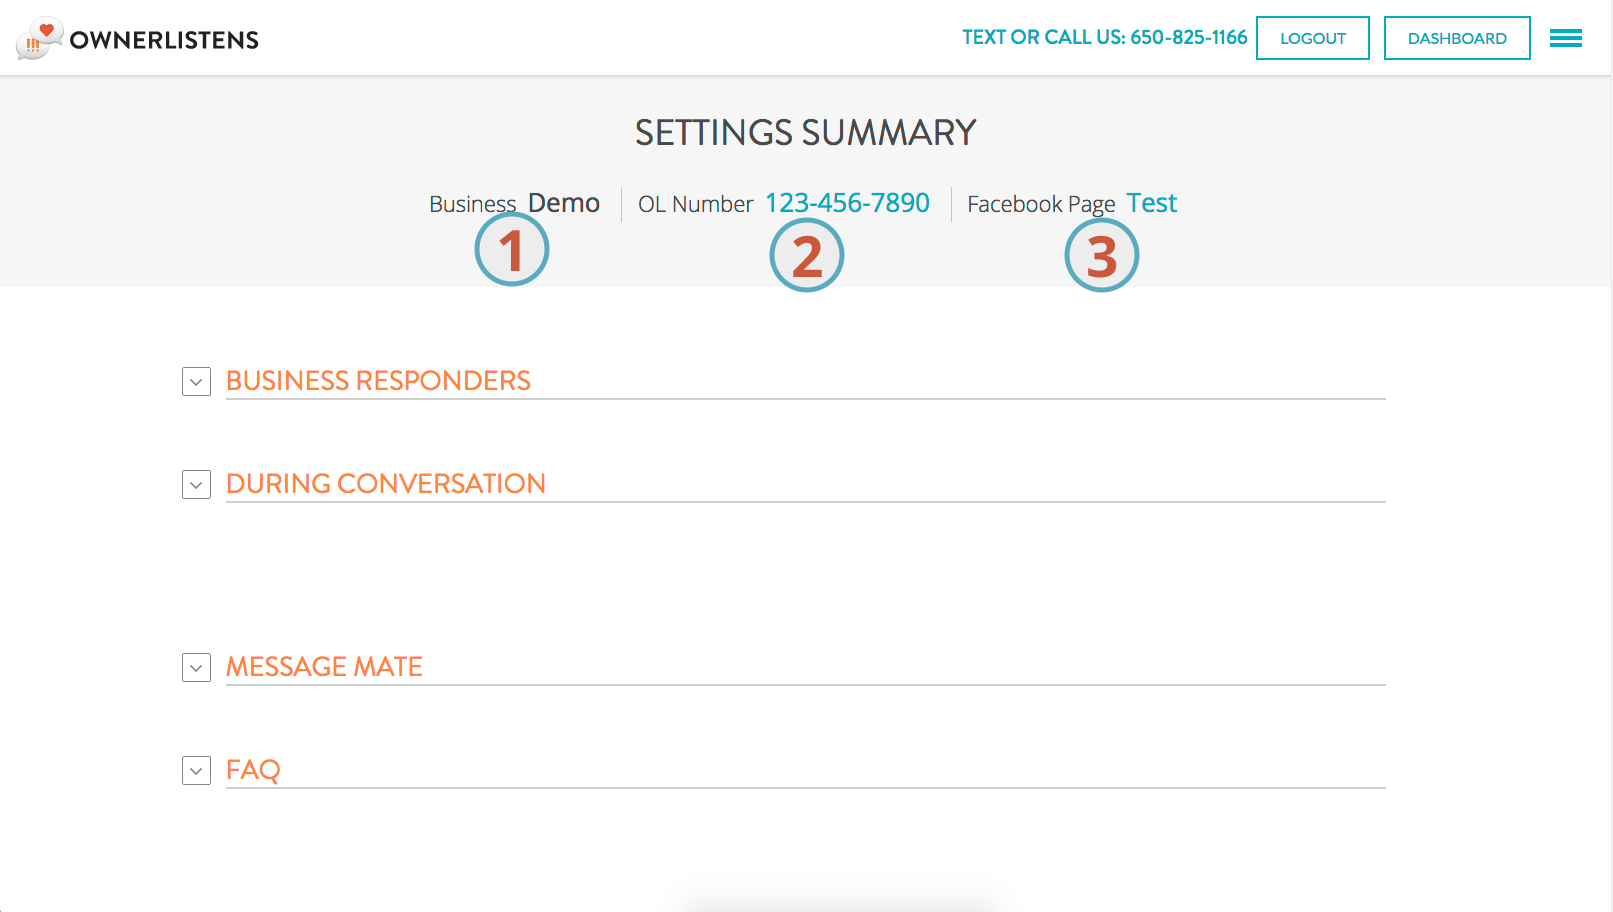
- This is your business’s name, just in case you forget 😉
- This is your business’s virtual number
- This is the name of the Facebook Page you connected to your account [requires higher tier plan]
Not seeing this page? Perhaps you have an organization with more than one business. Contact us so we can send you links that lead directly to the settings page for each business
Business Responders
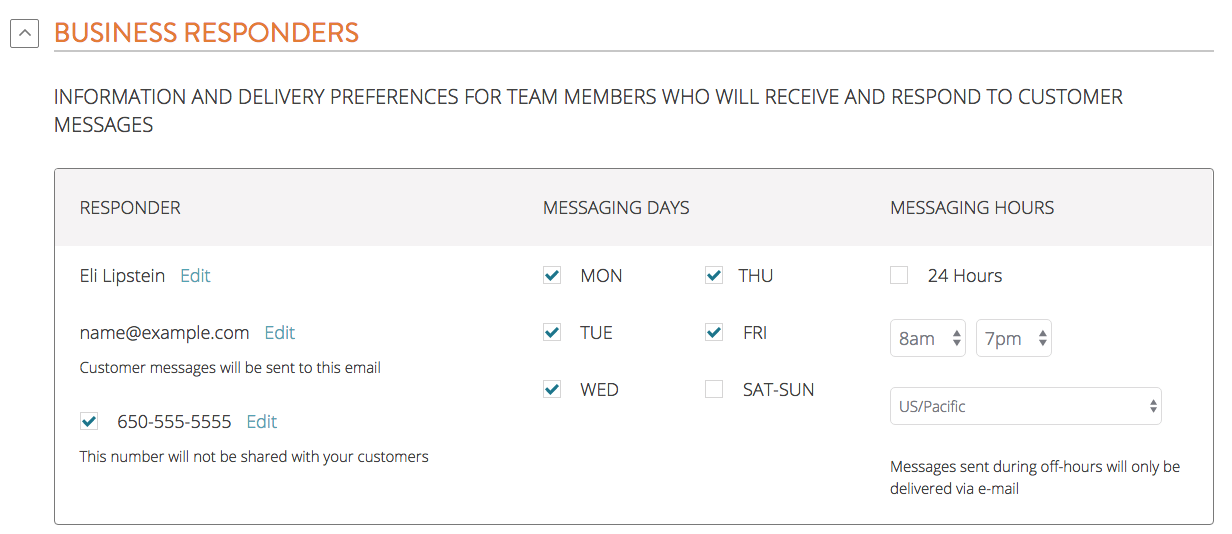
If you’re a manager, the first section of your Settings page lists all team members who are authorized to view or respond to incoming customer messages of that specific place. If you’re not a manager, you may only be able to see your own information, or you may not be able to add or remove team members.
For each team member you will see a first and last name, a username (which doubles as the email to which customer messages are delivered) and a phone number. If a phone number is entered for a team member, you may also limit the days and hours during which text messages are sent to their phone, or turn text messages off entirely by unchecking the box to the left of the number. A similar on/off setting is coming soon for email – if needed, please contact support and we can manually turn email notifications on or off for you.
If you have the appropriate privileges, you can also add or remove team members as responders for this location. Simply tap the “Add Responders” or “Remove Responders” links, as relevant.
Auto Replies
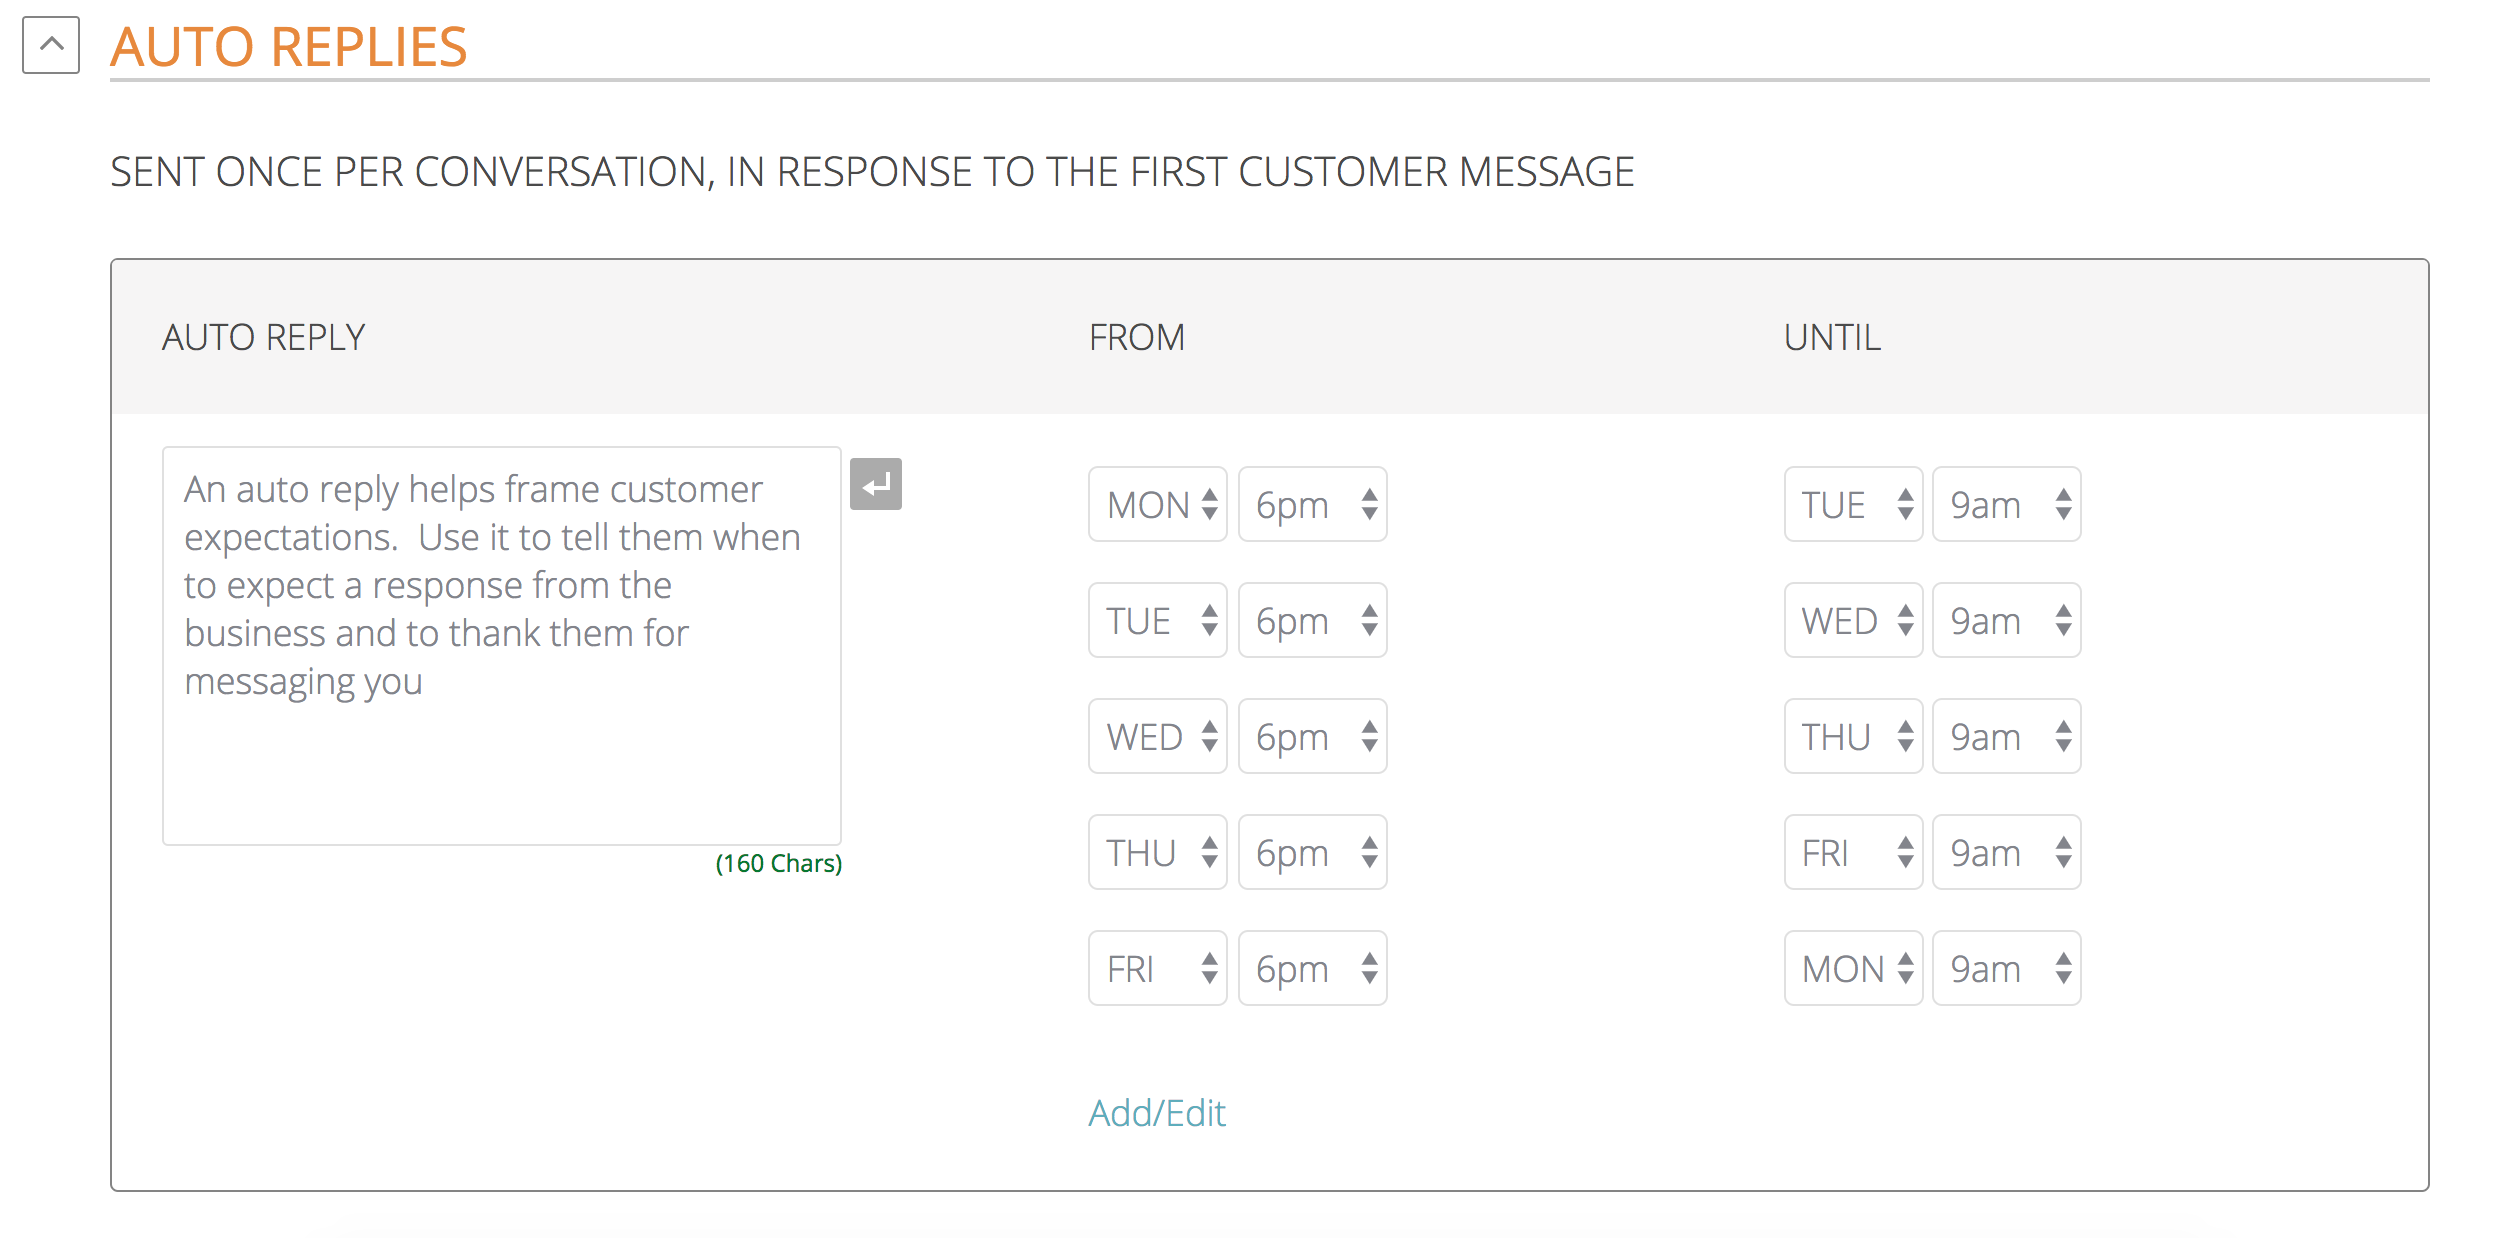
The next section down in the Settings page is concerned with messages sent during the conversation with the customer. Currently, this includes one or more auto messages sent to customers in response to their first message to the business. Depending on your plan, you can have up to 3 auto messages, sent at different days and times.
The leftmost column contains the text that is sent to the customer. To edit, click the blue EDIT link and enter your auto response, up to 160 characters (one text message). The next column over is the days of the week on which auto messages are sent and finally, you can control the times of the day during which auto responses are sent. This is typically used to have different auto messages sent as replies during or outside of business hours.
Template Responses

Template responses are a powerful tool to keep your team on the same page in terms of responses to customers, and to speed up your process by eliminating repetitive typing. The 3 column layout is the same as in the conversation pop-up in the dashboard (so the left-most column is always visible during conversation, the other two need to be scrolled to). Click a response to edit edit, click outside to save it. Drag and drop to change the order.
Note, a template response cannot exceed the length of two text messages (usually about 300 characters). Empty responses will always be appended in the Settings page, and will not be shown in the conversation pop-up.
Post Conversation
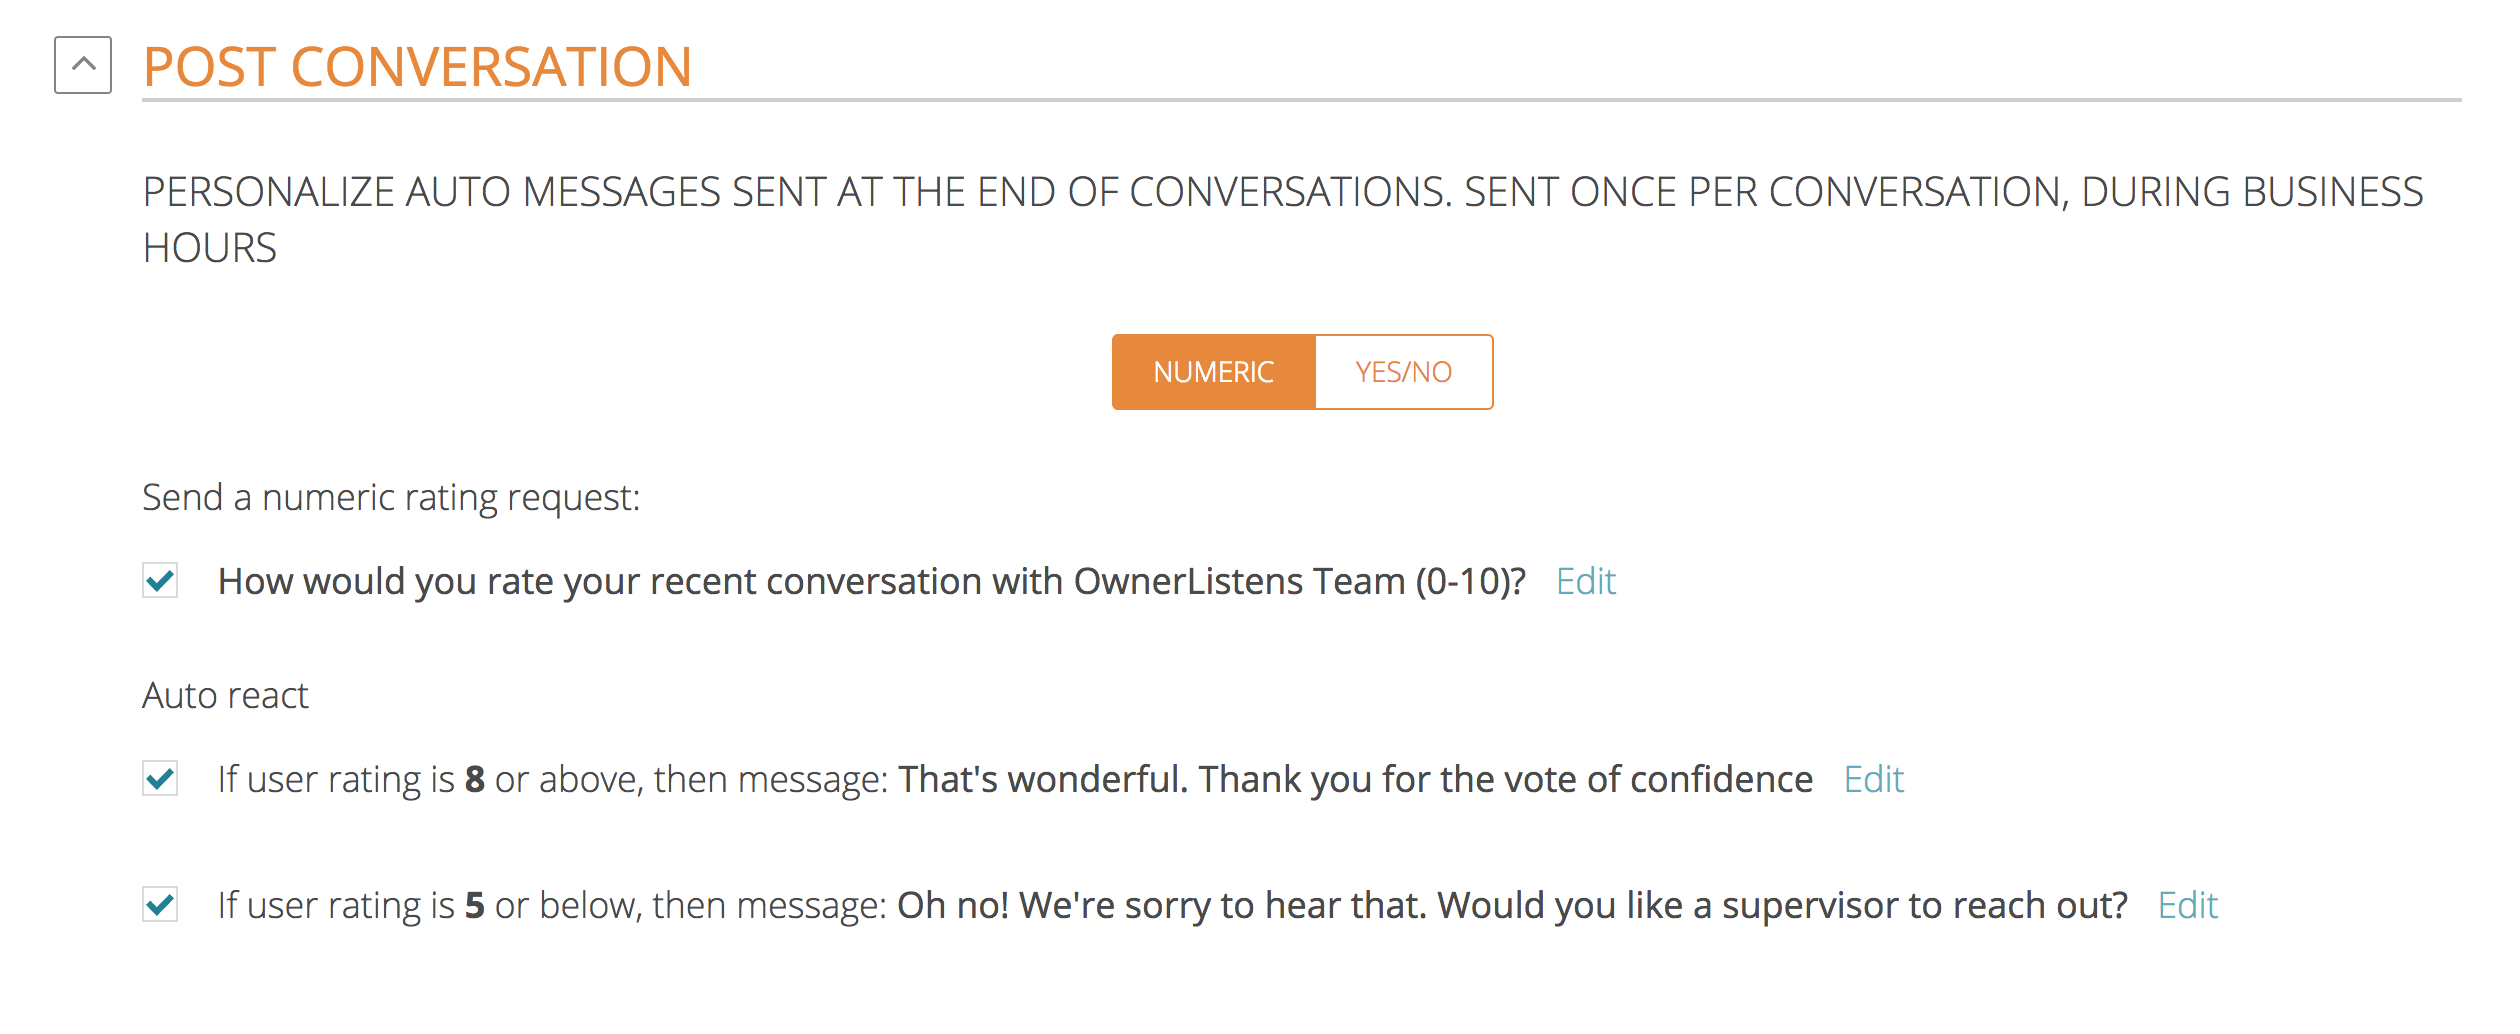
Here, you’re able to personalize your post-rating requests as well as responses to high and low ratings. At the end of conversations (after marking as resolved, or if the agent was the last person to respond and 24 hours have elapsed) you can choose to send either a numeric rating request – “how would you rate this conversation between 0-10” or a yes/no rating request – “would you recommend this service to a friend? (yes/no)”.
To enable a numeric rating request, select the tab titled “Numeric”, click the selection box on the left, then click the blue edit link to edit the text of the rating request and specify the acceptable ratings range (0-10, 1-10, 1-5, etc.)
To enable a yes/no rating request, select the tab titled “Yes/No”, click the selection box on the left, then click the blue edit link to edit the text of the rating request. Remember, this type of rating request can only accept yes or no as an answer.
You can also personalize what happens after the customer delivers a rating, under Auto React. Choose a rating above which a positive message is sent and a rating below which a reparative message is sent. This functions in a similar manner for yes/no ratings.
Message Mate
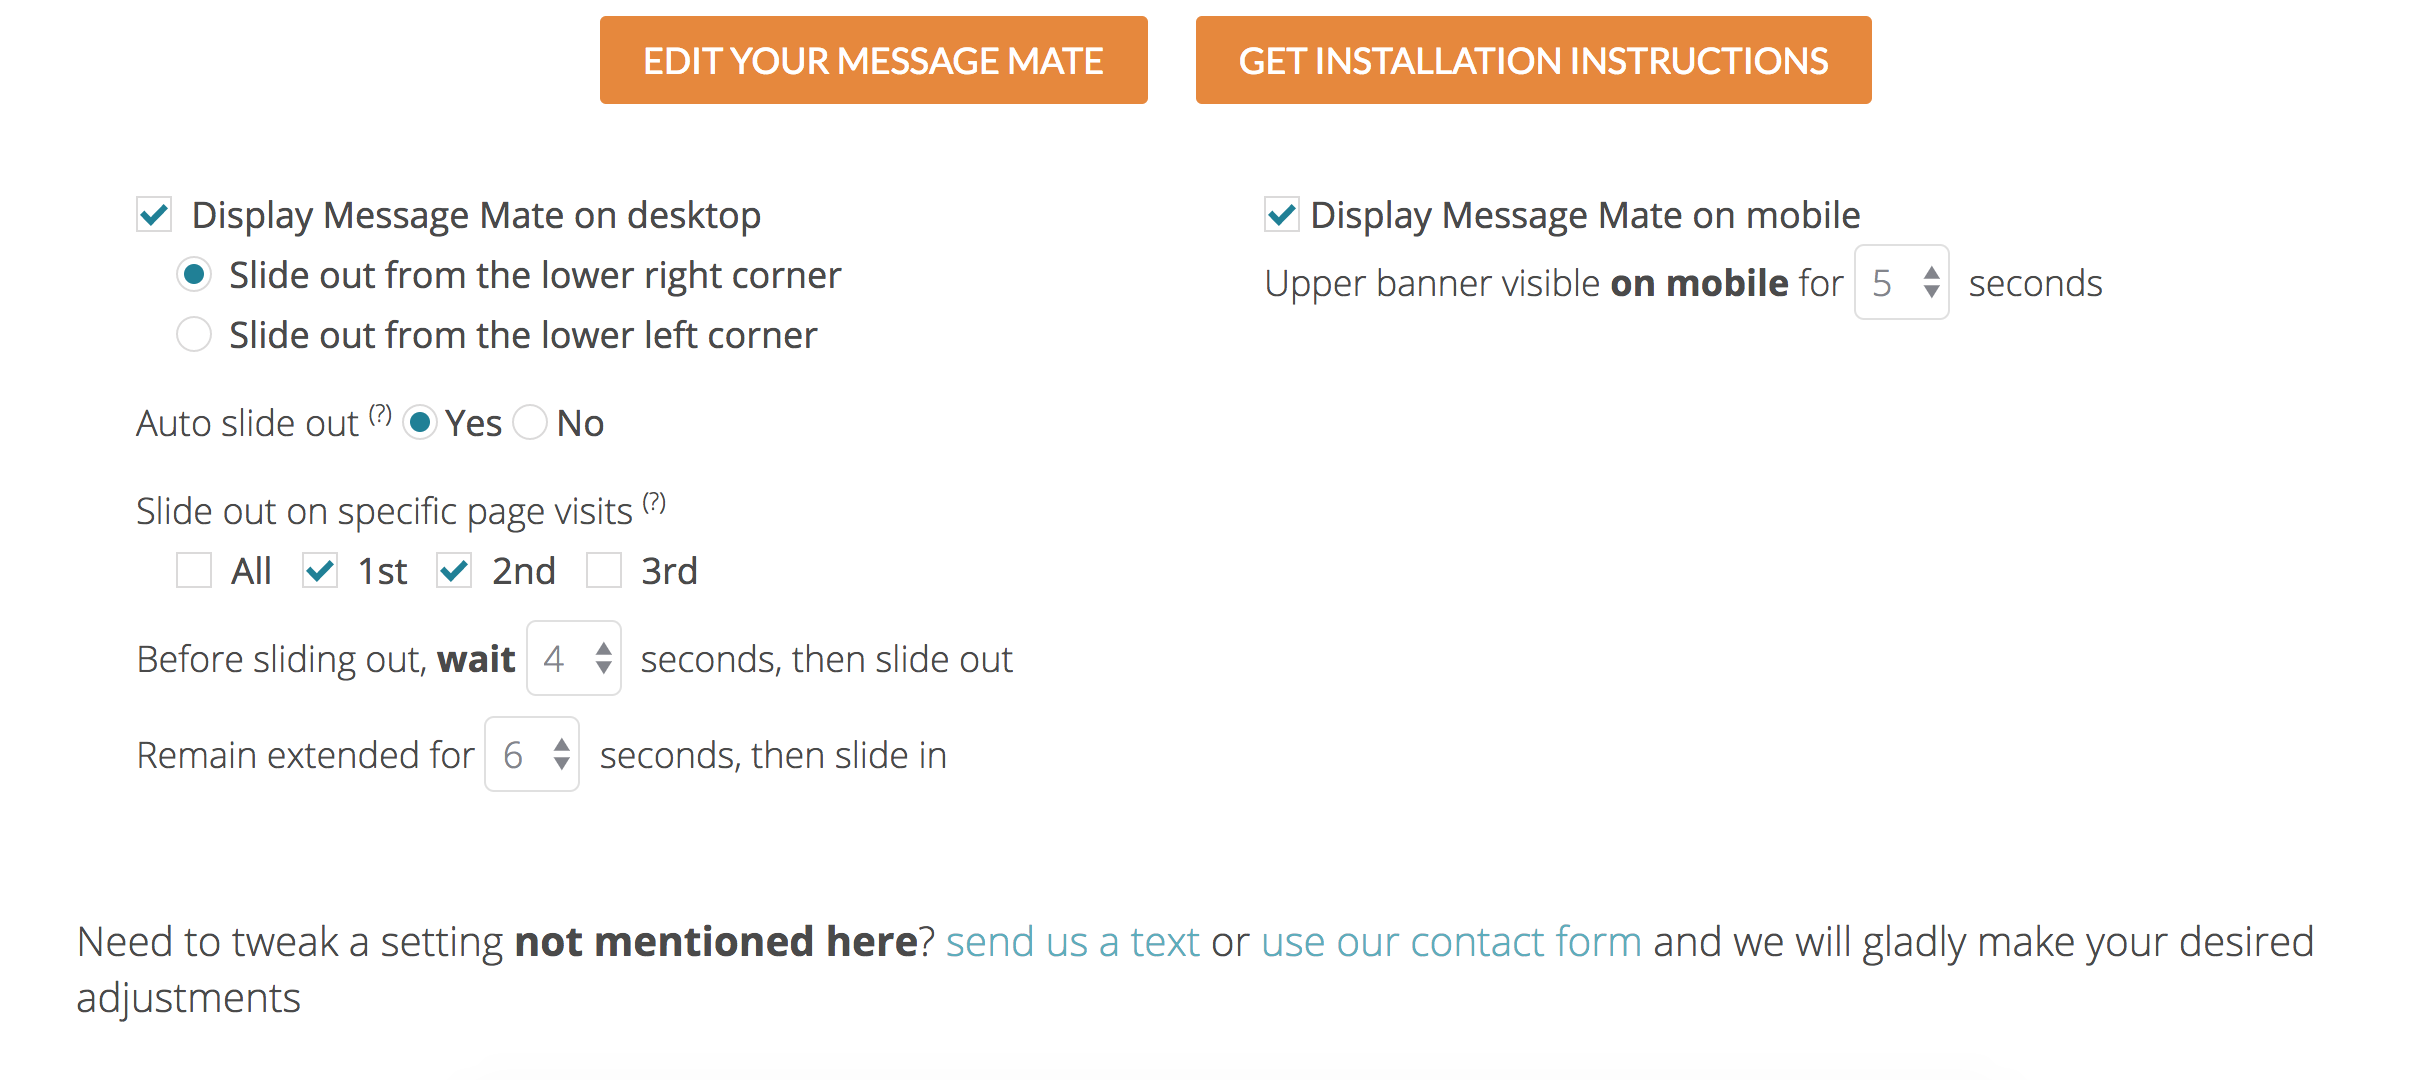
This section shows your existing Message Mate, with an EDIT link. You can also follow this link if you need to see the installation instructions again. Don’t have a Message Mate – click the orange button to create yours.
Below the buttons, are several settings to control the behavior of your Message Mate. First, by checking the boxes on the right or left you can choose to have Message Mate shown on mobile only, desktop only, both or neither. If displaying on mobile, you can control how long the upper banner of Message Mate remains visible after the user scrolls.
Desktop settings allow you to control whether Message Mate should appear on the bottom right of the screen or the bottom left of the screen. Then, you can control whether Message Mate should slide out automatically, on which pages and in what manner (how long it should wait before sliding out and how long it should remain visible for).
More features are being added constantly so follow our blog and check the settings page frequently to see what new features become available. Have a setting you’d like to control? Let us know about it via text (650-825-1166) or email and maybe you’ll win an OwnerListens t-shirt if we turn your request into a feature.